Skip to content
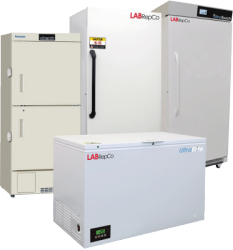
Laboratory cold storage and the protection of sensitive samples rely heavily on temperature uniformity. A manual defrost laboratory freezer will ultimately provide the best temperature uniformity when maintained properly. But manually defrosting a freezer can be strenuous and time consuming. Whether your laboratory consists of ultra low temp freezers, deep chest freezers or even standard upright and undercounter freezers, this article will help simplify the manual defrost process.
When should you defrost your manual defrost laboratory freezer?
This question relies on your laboratory’s standards/preferences and what you are storing in your freezer. You must constantly monitor your freezers frost and internal temperature in order to ensure your samples are safe. When frost builds up in a freezer it begins to insulate the walls which will eventually warm the internal chamber. More Frost = Less Temperature Uniformity.
A good rule of thumb is to not let the frost build up more than ¼ to a ½ inch of ice. If any temperature fluctuations being to occur and frost build up is visible in your freezer, it’s probably a good time to defrost. Defrosting will not only save your samples and your research, but will also extend the life of the freezer and lower energy costs.
Before you defrost, PLAN AHEAD!
A few things you will need to plan before manually defrosting your freezer:
- 2 Day Process:
- Make sure you plan for at least 48 hours of freezer downtime
- Back Up Freezer Available:
- Make sure there is a freezer available that is capable of storing the samples at the same temperature. You will be removing all contents from the freezer that will need to be defrosted. Don’t start the process without having your back up freezer up and running at the proper temperature.
- Alert Your Peers:
- Most likely there are multiple people using your lab, the freezer you are defrosting and the samples within that freezer. Make sure all laboratory personnel know which freezer(s) you will be defrosting and where the samples will be temporarily stored.
Once you have a scheduled timeframe, a backup freezer set up, and alerted all personnel, you are ready to begin the defrosting process!
Let’s Begin Defrosting:
- Remove Everything from Freezer. Remove all contents from the freezer you are about to defrost and place them into the back up freezer. Make sure this Manual Defrost Laboratory Freezer is at optimal temperature for the specific samples you are storing.
- Unplug the Freezer. Unplug your freezer to begin the warm up/melting process. It is best to do this in the morning so you can monitor any water or ice runoff during throughout the day.
- Let it Melt Away, NEVER CHIP AWAY: Melting can take a while and it has to be monitored and cleaned up frequently so water doesn’t run everywhere in the lab. To speed this up, work from the top down and spray (or sponge) hot water on the coils and wire racks and set up a reservoir system for the water to run into a bucket or pan. NEVER USE SHARP OBJECTS TO CHIP AWAY AT THE ICE! THIS COULD PERMANENTLY DAMAGE THE FREEZER!
- Dry it Out: Once the ice has completely melted you need to make sure the freezer is completely dried out so ice does not form once the freezer is plugged back in.
- Plug it In: Place your freezer back in its normal space and plug it back it to turn it on. Allow for optimal time in order for the unit to come back down to the desired temperature.
- Replace Contents: Once your freezer has reached the set temperature, you may now return your sample inventory back into the freezer.
For a full selection of Manual Defrost Laboratory Freezers, click here.